A universal joint the size of your fist is all that links a truck's transmission to its drive axle — and when it lets go at speed, the driveshaft drops and can tear out the brake and fuel lines on its way down. The good news: a U-joint almost never fails without warning. A proper universal joint inspection catches the sequence — dry joint, play, vibration, then a clunk — while it's still a fifteen-minute fix. Book a demo to see driveline PM tracked by asset.
A U-Joint Warns You Four Times Before It Drops
Driveline failure isn't sudden — it's a sequence. Dry joint, then play, then vibration, then a carrier growl, then separation. Every stage before the last is a checkpoint you can catch. Miss all four and the driveshaft ends up on the interstate.
The driveline is the most overlooked system on a truck for one simple reason: it's out of sight, tucked under the chassis, and it works flawlessly right up until it doesn't. But a U-joint failure is one of the most predictable failures on the whole vehicle — because it announces itself in stages. The skill of a driveline inspection is knowing how to read those stages and act on the early ones, not the last one.
Why the Driveline Fails — and Why It's Preventable
Before the procedure, the cause. The overwhelming majority of U-joint failures trace back to one thing: a missed grease interval. Understand that, and the whole universal joint inspection becomes obvious.
A dry joint wears fast
A U-joint rides on tiny needle bearings that need grease to survive. Skip the lube interval and the grease breaks down, the needles run dry, the bearing caps score the trunnions, and play develops — the start of the whole failure chain.
Lube plus a play check
Grease on schedule and check for play at every PM, and you catch the wear before it becomes vibration. The inspection isn't complicated — it's a lube task and a hand check, done on an interval, logged against the asset.
That's the whole game: a driveline failure is almost always a maintenance failure, not a random one. The joint didn't ambush you — a grease interval got skipped, a play check never happened, and an early symptom got waved off. Which means it's exactly the kind of failure a scheduled, logged preventive maintenance program prevents. Unplanned roadside breakdowns are among the most expensive events a fleet absorbs — and a dropped driveshaft is one of the worst.
The Core Check: Measuring U-Joint Play
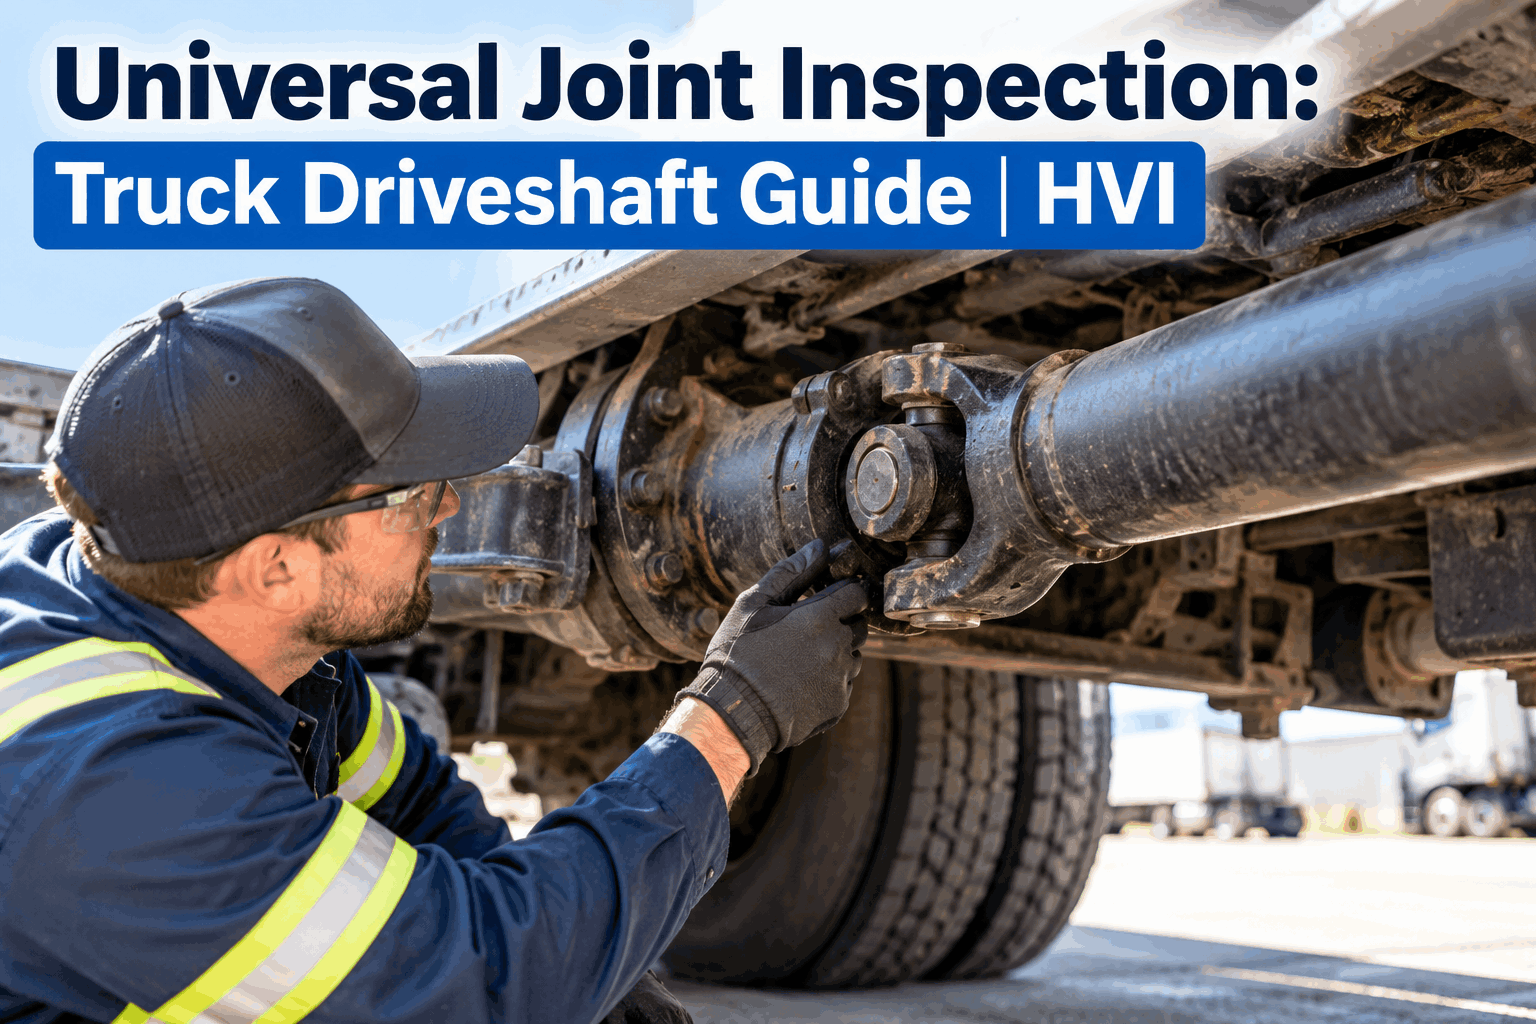
The single most important thing a driveshaft inspection does is check for play — free movement in the joint that shouldn't be there. It's a hands-on check, and a good U-joint has none.
With the truck safely secured, parking brake set and wheels chocked, work with the driveshaft stationary. You're testing the joint, not spinning it.
Take hold of the driveshaft on both sides of the U-joint and try to move it — twist it rotationally and push it radially against the direction of the trunnions.
A good joint is tight with no perceptible movement. Any play, clicking, or a gritty catch as it moves means the bearings are worn — the joint is on its way out.
Work the slip yoke for excessive play, and grab the driveshaft at the center bearing to check the carrier. Play anywhere in the driveline gets logged.
The key standard: on a U-joint, there is no "acceptable" amount of play. Unlike a wheel bearing with a measured end-play spec, a driveline joint should be tight — any detectable free movement is a fault. That makes the check clean to record: tight and good, or play detected and flagged. Log it every inspection so you watch a joint develop wear rather than discover it at failure. Start free and log a play check on every driveline PM.
Reading the Escalation: What Each Symptom Means
A driveline tells you it's failing in a specific order, and each symptom points to how far gone it is. Learn the sequence and you can place any joint on the timeline — and know how urgent it is.
The line to hold is between "diagnose" and "out of service." A vibration buys you a diagnosis; a clunk on take-up or a growl from the center bearing does not — those are advanced wear that can progress to separation quickly, and the truck comes off the road. Reading the symptom for its stage is what turns a vague "driveline noise" complaint into a clear go/no-go call. Book a demo to see driver vibration reports tied to the asset.
The Carrier Bearing: The Driveline's Second Failure Point
On a truck with a two-piece driveshaft, the center support — the carrier bearing — is its own failure point, and it fails differently from a U-joint. A thorough carrier bearing inspection deserves its own place on the check.
A growl that rises with speed
A failing carrier bearing sends a rumble or growl through the cab floor that tracks road speed — distinct from a U-joint's vibration. Grab the shaft at the center and check for play and roughness in the bearing.
Cracked or perished rubber mount
The bearing sits in a rubber isolator that cracks, softens, and separates with age and heat. A perished mount lets the shaft sag and vibrate — inspect the rubber, not just the bearing.
Heat and grease slung out
A carrier bearing running hot, or grease flung around the mount area, signals a bearing on its way out. Left alone it seizes or lets the shaft drop — the same catastrophic result as a U-joint separation.
The carrier bearing matters because it's easy to misdiagnose — a driver reports "a vibration" and everyone chases the U-joints, when the real fault is the center support. Checking it as its own item, by its own symptoms, keeps you from replacing good joints while the actual failure keeps growling. Start free and add the carrier bearing as its own check item.
Lube: The Interval That Prevents Most of This
Since a dry joint starts the whole failure chain, greasing is the highest-value driveline maintenance task there is — and it has a right way to do it.
Many U-joints have a grease fitting and must be lubed on interval; some are sealed-for-life with none. Know which your driveline has — a greaseable joint left ungreased is a guaranteed early failure.
Grease until fresh grease purges from all four bearing cap seals. If one cap won't purge, that trunnion is blocked or already failing — a finding in itself.
Follow the OEM's lube interval for the driveline — it's usually tighter than other chassis lube points because the joint works hard. Track it as its own recurring PM, not a "when we remember" task.
The four-cap purge is the tell that separates a real grease job from a squirt-and-move-on: watching every cap take grease confirms every bearing got lubricated, and flags the one that didn't. Done on the OEM interval and logged, it prevents the dry-joint start of the failure chain for the great majority of joints. Book a demo to schedule the driveline lube on the OEM interval.
When the Driveline Comes Out of Service
Some findings are a plan-to-repair; on the driveline, several are a stop-now. Because a separation is potentially catastrophic, these conditions tag the truck immediately.
A driveline joint should be tight. Perceptible play, clicking, or a gritty catch means worn bearings — the joint is replaced, not watched.
Bearing caps that have lost their seals, are leaking rollers, or show reddish wear dust are past worn — failure can follow quickly.
A load clunk or a growling center bearing is advanced wear that progresses to separation. The truck comes off the road for it.
A perished center-bearing mount, or loose U-joint straps or bolts, can let the shaft drop. Secure and sound, or out of service.
The reason the driveline gets a lower tolerance than most components is the failure mode: a separated driveshaft at speed doesn't coast to a stop — it flails, can spear into the ground or the vehicle behind, and takes out whatever lines and crossmembers it hits. There's no partial credit on a driveline finding. When in doubt, it comes out. Book a demo to see tag-out conditions enforced on the inspection.
How HVI Turns the Driveline Into a Managed System
Everything above depends on the same discipline: grease on interval, check play every time, and log it so wear shows as a trend. Three capabilities make the driveline a tracked system instead of an out-of-sight gamble.
Driveline lube & inspection PM
Schedule the U-joint lube and play check on the OEM interval — by meter reading or calendar — as a recurring PM, so the grease that prevents most failures never slips and every unit gets checked on time.
Play readings & symptom capture
Log the play result, the four-cap purge, and any driver-reported vibration or clunk against the asset — so a joint developing wear over successive inspections is visible as a trend, not a one-off note.
Work orders & asset records
Turn a flagged joint or carrier bearing into a work order in one click and keep the full corrective-action history per asset — so the tag-out conditions are enforced and every repair is documented.
The result is a driveline managed like the safety-critical system it is: greased on schedule, checked and recorded every PM, symptoms captured, and defects turned into tracked work orders — all on the asset record. The out-of-sight component that used to fail on the interstate becomes the one you catch at the first dry joint. Book a demo to see it on your fleet.
From a shop tech who caught it at stage one
I found a rear U-joint on a day cab bone dry with that red dust around the caps — textbook stage one, no play yet. Greased it, logged it, flagged the unit for a shorter lube interval. The driver told me later that truck had a "little vibration" he'd meant to mention. If we'd waited on him, that joint would've been at play or worse. Now every driveline PM logs the play check and the purge — we catch them dry, not dropped.
Key takeaways
A universal joint inspection is really a habit, not an event: grease on the OEM interval, put your hands on the joint to check for play every PM, and read the warning sequence — dry, play, vibration, clunk, carrier growl — so you act at stage one, not stage five. Any detectable play, a clunk, or a center-bearing growl is out of service, no partial credit. Do the small thing on schedule and log it, and the driveline stops being the out-of-sight gamble it is for most fleets.
Frequently asked questions
How do you check a U-joint for wear?
With the truck safely secured and the driveshaft stationary, grip the shaft on both sides of the U-joint and try to move it — twist it rotationally and push it radially. A good joint is tight with no perceptible movement. Any play, clicking, or a gritty catch as it moves means the needle bearings and trunnions are worn. Also check the joint visually for a dry or rusty appearance and reddish-brown dust around the bearing caps, which signals lost lubrication. On a U-joint there's no acceptable amount of play — any detectable free movement is a fault to flag.
What are the signs of a failing U-joint?
They appear in a sequence. First a dry or rusty joint with reddish dust around the caps, from lost grease. Then detectable play in the joint as the bearings wear. Then a vibration that rises with road speed. Then a clunk on take-up — a bang when torque loads or unloads — from the slack in a badly worn joint. A separate but related symptom is a growl or rumble from the center of the truck, which points to the carrier bearing rather than a U-joint. Each stage is more urgent than the last; a clunk or growl means out of service.
How often should truck U-joints be greased?
On the interval the driveline OEM specifies, which is typically tighter than other chassis lube points because the joint works hard — often at every PM or on a set mileage or hour interval. Grease a greaseable joint until fresh grease purges from all four bearing cap seals; if one cap won't purge, that trunnion is blocked or failing. Some U-joints are sealed-for-life with no fitting and can't be greased. Because a missed grease interval is the leading cause of U-joint failure, the lube should be tracked as its own recurring PM rather than a when-we-remember task.
What is a carrier bearing and how does it fail?
The carrier (center support) bearing supports a two-piece driveshaft partway along its length, held in a rubber isolator mount. It fails differently from a U-joint: the giveaway is a growl or rumble through the cab floor that rises with road speed, versus a U-joint's vibration. The rubber mount also cracks, softens, and perishes with age and heat, letting the shaft sag and vibrate. A carrier bearing running hot or slinging grease is on its way out, and left alone it can seize or let the driveshaft drop — the same catastrophic result as a U-joint separation, which is why it's inspected as its own item.
Why is a driveshaft failure so dangerous?
Because a driveshaft that separates at speed doesn't simply stop the truck — it drops and flails. One end can dig into the pavement and act as a pole, potentially lifting or launching part of the vehicle, while the whirling shaft can spear into the ground, the vehicle behind, or the truck's own brake lines, fuel lines, and crossmembers. It's an uncontrolled, high-energy failure. That severity is why the driveline gets a lower tolerance than most components: any detectable U-joint play, a clunk on take-up, a carrier growl, or a cracked center mount is an out-of-service condition, not something to watch.
Catch Drivelines at the Dry Joint, Not on the Interstate
Schedule the U-joint lube and play check on the OEM interval, log the reading and the four-cap purge against the asset, capture driver-reported vibration, and turn flagged joints and carrier bearings into work orders — so the most predictable catastrophic failure on the truck gets caught at stage one. Live in under two weeks, trusted by 25,000+ users worldwide.
No credit card · No hardware · Driveline PM templates ready on day one