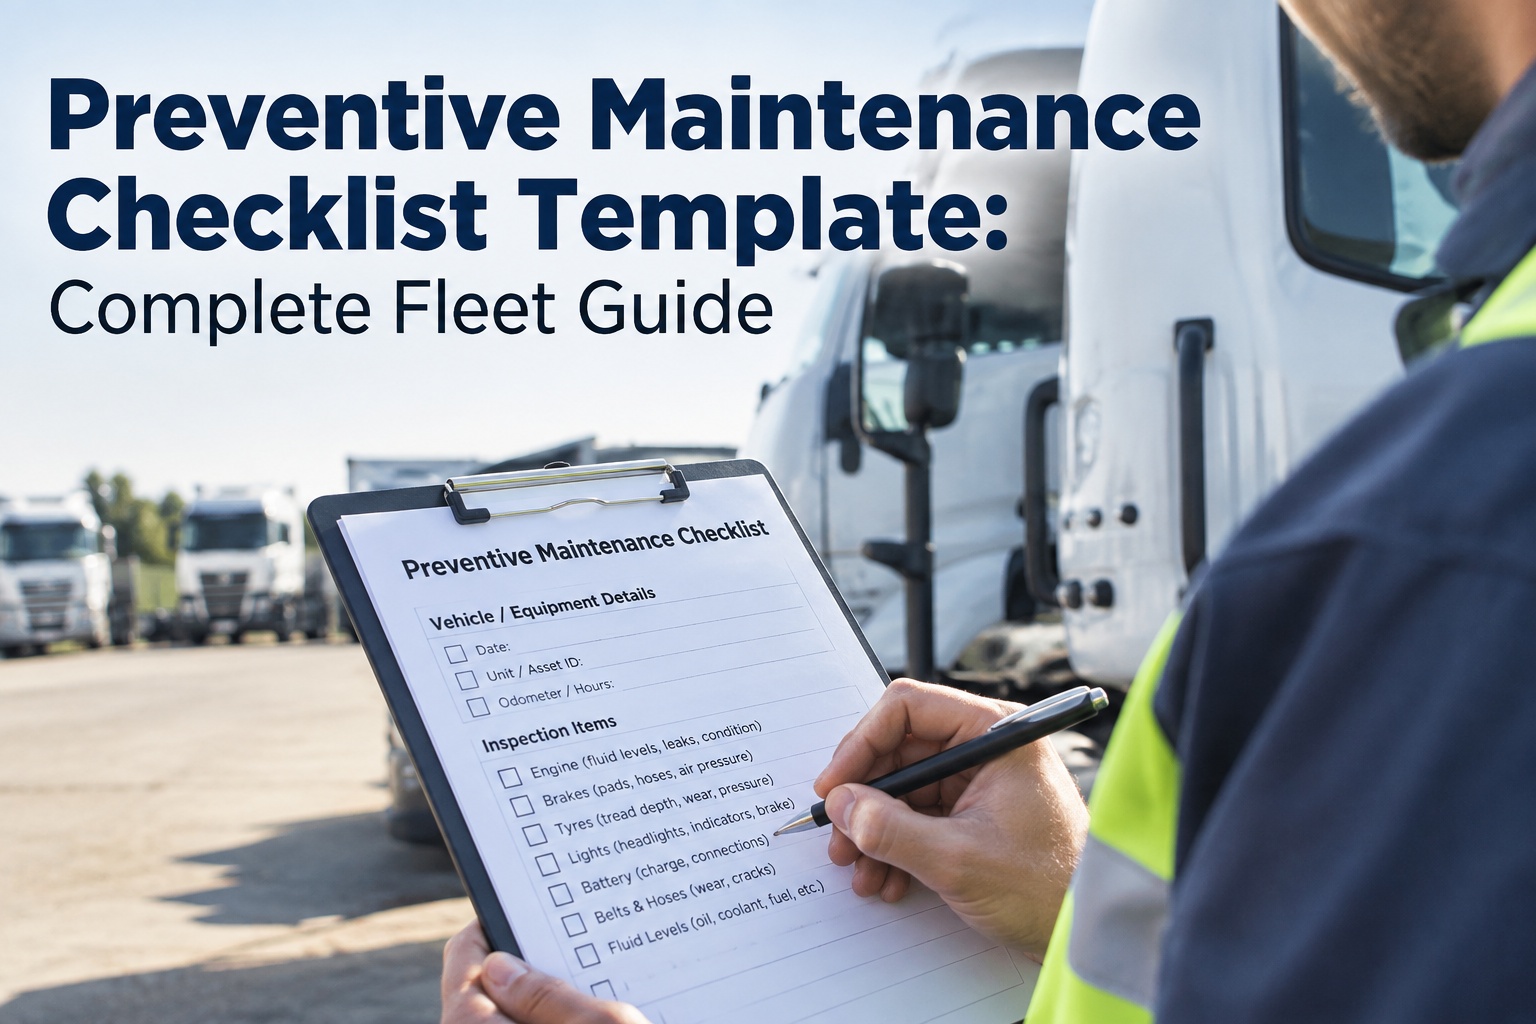
Most preventive maintenance checklists are copied from a generic form, and it shows: a technician ticks "brakes — OK," the truck rolls out, and three weeks later it's on the shoulder with a problem that box was supposed to catch. The issue isn't the technician; it's the checklist. A good preventive maintenance checklist template doesn't just list systems — it tells the tech what to measure, what number fails, and what happens next. This guide is about designing checklists that find real defects. Book a demo to see configurable PM templates built in HVI.
How to Design a Preventive Maintenance Checklist Template
The difference between a checklist that catches defects and one that just gets signed comes down to design. Here's how to build one that produces measurable, actionable findings.
Educational guide. Distinguish manufacturer specs, regulatory requirements, and recommended practice for your specific assets.
A preventive maintenance checklist is only worth the paper — or the app screen — it lives on when its design forces a real observation. The difference between a form that prevents breakdowns and one that just creates a signature trail is entirely in how the items are written. Below are the design principles that turn a checklist from a compliance ritual into a defect-finding tool, plus how to adapt them by asset class and keep improving them over time. This isn't a list of parts; it's how to build the list.
Principle 1: Write measurable items, not vague ones
The single biggest flaw in most PM checklists is subjective language. "Check tires" means one thing to a careful tech and another to a rushed one. Replace every judgment call with a measurement and a threshold, and the finding becomes consistent no matter who's holding the flashlight.
- Check tire condition
- Inspect brakes
- Look at belts and hoses
- Verify fluid levels
- Tread depth, each position: ___ /32in (record value)
- Brake lining/pad thickness: ___ · pushrod stroke: ___ in
- Belt cracks per inch / hose firmness: pass / fail + note
- Coolant, oil, DEF, hydraulic: level + condition, each
Notice what the measurable version does: it captures a value, not just a checkmark. That value is what lets you trend wear over time, prove a component was in-spec at last service, and set an objective fail point. A checklist that records "tread: 6/32, 5/32, 6/32, 4/32" is data; one that records "tires: OK" is noise. Where a specific threshold is safety- or compliance-critical, always anchor it to the manufacturer's spec or the applicable regulation for that asset, not a number pulled from a generic form. Book a demo to build measurement fields into every critical item
Principle 2: Give every critical item four parts
A well-designed inspection item isn't one line — it's a small structure that removes ambiguity and forces the right follow-up. The best PM checklist templates build each safety-critical item from the same four components.
Name the exact part and location, not the system. "Left steer tire tread" beats "tires" — it tells the tech precisely where to look and makes the record searchable later.
What to measure and the unit, or the specific defect to look for — tread in 32nds, stroke in inches, "chafing through outer cover." No interpretation required.
The pass/fail line, tied to the manufacturer or regulatory limit for that asset. This is what turns a reading into a decision instead of a guess.
A photo or value capture for critical items, plus what happens on a fail — note, work order, or immediate out-of-service. The item carries its own follow-up.
Build items this way and the checklist does the thinking for the technician: it points to the part, says how to judge it, defines the fail line, and captures proof. That's the whole difference between a form that generates defensible maintenance records and one that generates a stack of checkmarks nobody can act on. Start free on HVI to structure critical items with built-in evidence capture.
Principle 3: Order tasks around a physical walk-around
A checklist that jumps from the engine bay to the rear axle to the cab and back wastes time and invites skipped items. Where it fits the asset, order the checklist to follow one continuous physical path around and through the machine, so the tech never backtracks and nothing gets missed.
Leaks under the unit, body/glass, lights, gauges, warning lamps, controls.
Fluids, belts, hoses, filters, battery, visible leaks and wear.
Brakes, suspension, steering, driveline, frame, exhaust/aftertreatment.
Tires, wheels, fasteners, then a full circuit for lights and coupling.
The logical sequence matters more than the exact zones, which vary by asset. A yard truck, an excavator, and a reefer trailer each have a natural walk path — the point is that the checklist mirrors it, so the physical work and the digital form move together instead of fighting each other. This is also where guided digital checklists earn their keep: they enforce the sequence and won't let a step get silently skipped, so the walk-around stays complete even on a rushed morning.
Principle 4: Define what happens when an item fails
A finding that doesn't trigger an action is a finding that gets forgotten. The best checklists don't just detect a defect — they route it. Build escalation rules directly into the template so a failed item can't quietly close.
Record the value, move on. The measurement is still logged for trending, even when it's good — that's how you see wear coming.
Within limits but approaching the threshold. Flag it, note the value, and shorten the interval or watch it at the next PM.
Below the limit. Auto-generate a work order, attach the evidence, and assign it — the defect can't be closed without a resolution.
A safety-critical failure. Hard stop: the unit is flagged and held from dispatch until repaired and re-inspected.
This escalation logic is where a checklist stops being a document and becomes a workflow. When a below-limit brake reading automatically spawns a work order with the photo attached, nothing depends on the technician remembering to tell someone. The severity tiers you use should reflect your own operation and the safety-critical thresholds for your assets — build them once into the template and every tech applies them the same way. Book a demo to wire defect escalation into your PM checklist
Principle 5: Differentiate by asset class
One universal checklist across a mixed fleet is a design failure. A tractor, a trailer, an excavator, and a reefer share almost no critical inspection points — forcing them onto one form means every asset gets items that don't apply and misses items that do. Design a base template per asset class, then let intervals and specifics vary from there.
Engine, aftertreatment, brakes, steering, fifth wheel, drivetrain. Interval by mileage or engine hours.
Brakes, tires, lights, coupling, structure, doors/seals. Interval often by calendar or mileage.
Hydraulics, undercarriage, attachments, structure, fluids. Interval by engine hours, not miles.
All trailer items plus refrigeration unit, temperature logs, fuel/run-hours. Interval by run hours.
The efficient way to manage this isn't four unrelated forms — it's a shared design language (measurable items, four-part structure, escalation rules) applied to asset-specific content. That's exactly what configurable templates make possible: the same rigor everywhere, the right items on each machine. HVI already offers ready-made PM checklists by service class and asset type you can start from and adapt rather than building from a blank page. Start free and customize an asset-class template to your fleet.
Principle 6: Close the loop and improve the checklist
A checklist isn't finished when you deploy it — that's when the real design work starts. The findings it produces (and the failures it misses) are the feedback that makes the next version sharper. This is the step almost every fleet skips.
Which items fail most often, on which units? A component failing repeatedly signals either a real reliability problem or an interval that's too long.
When a breakdown happens between PMs, ask whether a checklist item should have caught it. If yes, the item needs a tighter threshold or a measurement it didn't have.
Items that never produce a finding across hundreds of inspections may be adding time without value. Data tells you what to cut as well as what to add.
Let real findings, not just the OEM default, inform how often a problem-prone unit gets serviced — more frequent where defects cluster.
This closed loop is impossible with paper and painful with spreadsheets, because you can't search or trend what you can't query. When every completed checklist is a structured, searchable record, "which brake components fail most on our 2019 tractors" becomes a two-minute query instead of a week of digging — and that answer is what drives the next, better template. Book a demo to see recurring-defect analytics across your PM history
From a shop manager who rebuilt his checklists
Our old PM sheet had about forty lines and every one of them was "inspect this, check that." Techs flew through it in twenty minutes and we still had trucks coming back with brake and tire issues that "passed" the week before. The form wasn't wrong, it was just useless — nothing on it forced an actual number.
We rebuilt it so the critical items capture a measurement and a photo, and anything below limit spins up a work order on its own. Same techs, same trucks — but now I can pull up a unit and see its tread and lining trending down over three services before it ever becomes a failure. The checklist finally does something instead of just proving someone looked.
A better preventive maintenance checklist template is a design problem
The reason so many PM programs underperform isn't a lack of checklists — it's that the checklists are copied, generic, and built to be signed rather than to find defects. A preventive maintenance checklist template earns its keep when it's designed on purpose: measurable items instead of vague ones, each critical item built from a component, a criterion, a threshold, and an evidence field; tasks ordered around a real walk-around; escalation rules that route a failure automatically; separate base templates per asset class; and a closed loop that turns findings and misses into a sharper next version. Get those design principles right and the same technicians, on the same equipment, suddenly produce data you can actually act on.
None of this requires more labor — it requires better structure, and structure is exactly where static forms fall down and configurable digital templates take over. That's the core of what HVI does: build PM checklists by asset class with measurable findings, required evidence, and defect escalation, then keep every completed inspection as a searchable maintenance record you can analyze for recurring problems. Start from HVI's ready-made PM and asset-class templates and adapt them, rather than reinventing a form from scratch. Where an inspection criterion is safety- or compliance-critical, always confirm the specific threshold against the manufacturer's spec and the applicable regulation for your asset, since those can differ by make, model, and jurisdiction. Book a demo to build custom PM checklists in HVI.
Frequently asked questions
What should a preventive maintenance checklist template include?
A strong preventive maintenance checklist template includes far more than a list of systems to eyeball. For each critical item, it should specify four things: the exact component and its location (for example, "left steer tire tread" rather than just "tires"); the measurement or defect criterion to apply, with units (tread depth in 32nds of an inch, brake pushrod stroke in inches, or a specific defect such as chafing through a hose cover); the acceptable threshold or pass/fail line, tied to the manufacturer's specification or the applicable regulation for that asset; and an evidence and action field, meaning a place to record the measured value or a required photo, plus what happens if the item fails. Beyond individual items, the template should be organized around a logical physical walk-around so nothing is skipped, include built-in escalation rules that route failed items to a work order or an out-of-service hold, and be tailored to the specific asset class rather than forced into a one-size-fits-all form. Finally, a good template is treated as a living document: the findings it produces feed back into refining the items, thresholds, and intervals over time. The goal throughout is a checklist that produces measurable, actionable findings rather than a row of checkmarks.
How is a well-designed PM checklist different from a generic one?
The difference is almost entirely in how the items are written and what happens with the results. A generic checklist relies on subjective, binary prompts — "check brakes," "inspect tires," "verify fluids" — that different technicians interpret differently and that capture nothing beyond a checkmark. A well-designed checklist replaces each of those with a specific, measurable instruction and a defined threshold, so the technician records an actual value (a tread depth, a lining thickness, a fluid condition) against a known pass/fail line. That single change has large downstream effects: the recorded values let you trend component wear across multiple services and see failures coming; the objective thresholds remove guesswork and inconsistency between techs; required photos on critical items create defensible evidence; and built-in escalation ensures a below-limit finding automatically becomes a work order instead of a forgotten note. A generic checklist proves someone looked at the truck. A designed checklist tells you the measured condition of specific components, routes any defect to action, and builds a searchable history you can analyze. The labor to complete them is similar; the value they produce is not remotely comparable.
Should I use one checklist for my whole fleet or different ones per asset?
You should use different base templates for each asset class, because a single universal checklist across a mixed fleet is a design flaw that both wastes effort and misses critical items. A tractor, a trailer, an excavator, and a refrigerated trailer share very few of the same safety-critical inspection points: a truck has an engine, aftertreatment system, fifth wheel, and steering; a trailer's focus is brakes, tires, lights, coupling, and structure; heavy equipment centers on hydraulics, undercarriage, and attachments and is serviced by engine hours rather than miles; and a reefer adds a refrigeration unit and temperature records on top of trailer items. Forcing all of these onto one form means every asset carries irrelevant lines and, more dangerously, lacks items it genuinely needs. The efficient approach is not four disconnected forms but a shared design language — measurable items, the four-part item structure, consistent escalation rules — applied to asset-specific content, so each machine gets the right items with the same rigor. Configurable digital templates make this practical, letting you maintain a distinct, appropriate checklist per asset class while keeping the underlying standards consistent across your whole operation.
How do measurable thresholds improve maintenance findings?
Measurable thresholds convert a subjective impression into objective data, and that shift is what makes preventive maintenance genuinely preventive. When an item simply asks a technician whether a component is "OK," the result depends on that person's judgment on that day, captures no information, and can't be compared to anything. When the item instead asks for a specific measurement against a defined limit — record the tread depth, the pad thickness, the pushrod stroke — you gain several things at once. You can trend that value across successive services and watch a component approaching its limit before it fails, which is the entire point of preventive work. You get consistency, because the pass/fail line is the same regardless of who performs the inspection. You create a defensible record showing the component was in specification at the time of service. And you can set objective escalation, where a reading below the threshold automatically triggers the right response. It's important, though, to anchor each safety- or compliance-critical threshold to the correct source — the manufacturer's specification or the applicable regulation for that specific asset — rather than copying a generic number, since limits legitimately vary by make, model, component, and jurisdiction. Used that way, measurable thresholds turn a checklist into a data stream that drives real maintenance decisions.
Can I turn a paper PM checklist into a digital template?
Yes, and doing so is where most of the design principles in this guide actually become enforceable rather than aspirational. A paper or spreadsheet checklist can list good items, but it can't require a measurement to be entered, can't mandate a photo on a critical finding, can't stop a technician from skipping a step, can't automatically generate a work order when something fails, and can't be searched or trended afterward. Converting to a configurable digital template preserves everything useful about your existing form while adding exactly those capabilities: measurement and evidence fields on critical items, enforced walk-around sequencing, automatic defect escalation to work orders or out-of-service holds, and — crucially — a searchable record of every completed inspection. That last point unlocks the continuous-improvement loop, because you can finally query which items fail most, which units are problematic, and which checks never produce findings, then refine the template accordingly. A platform like HVI is built for this: it lets fleets create configurable maintenance and inspection templates by asset class, capture findings and evidence, standardize technician workflows, maintain historical records, and analyze recurring defects. The practical path is usually to start from a ready-made template, adapt it to your assets and thresholds, and refine it as real findings accumulate.
Build PM checklists that actually catch defects
HVI lets you build configurable preventive maintenance checklist templates by asset class — with measurable findings, required evidence, defect escalation, recurring schedules, and searchable records — then analyze recurring defects to keep sharpening them. Start from ready-made PM and asset-class templates and adapt them to your fleet. Mobile-first for the shop floor, live in under two weeks.
No credit card · Configurable PM templates by asset class · Measurable findings on day one