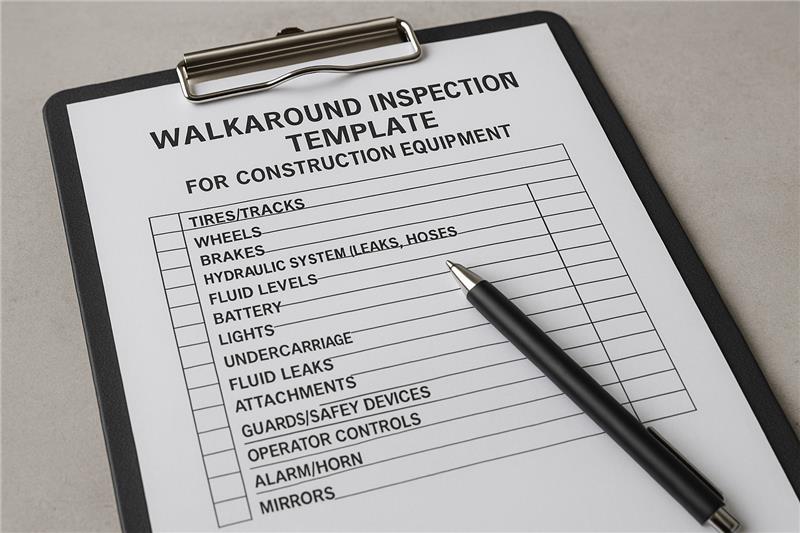
The drivers who clear roadside inspections in under three minutes did not get lucky — they ran a standardized 7-step walk-around that morning that caught every defect a Level 1 inspector would have flagged. The drivers who get pulled out of service for brake adjustment, tire condition, or burnt-out clearance lamps failed at the same moment: they skipped, rushed, or did the walk-around in a different order than the day before. In the 2025 CVSA International Roadcheck, 18.1% of all vehicles inspected were placed out of service — brakes (41% of OOS) and tires (21.4%) accounting for nearly two-thirds of those orders. Almost every one of those defects was visible during the walk-around the driver had already performed. The 7-step inspection method recommended by FMCSA is not about doing more checks. It is about doing the same checks in the same order every time so the eye catches what the mind would otherwise miss. Done correctly, the routine takes 10 minutes for a typical Class A combination, satisfies both 49 CFR 392.7 (functional safety components) and 49 CFR 396.13 (next-driver review), and beats the inspection criteria that produce 95% of roadside findings. This guide gives CDL drivers and trainers the exact walk-around sequence, the photo-paired component checklist for each zone, the time target per step, and the air-brake numbers that have to be memorized. HVI's inspection & maintenance software turns the 7 steps into a guided mobile workflow — same sequence every time, photos paired automatically with each component, defects routed to maintenance the moment a driver hits submit.
Run the Same 7-Step Walk-Around Every Morning — In 10 Minutes
HVI guides drivers through the FMCSA 7-step sequence with photo prompts per component, time tracking per zone, and instant defect routing to maintenance. The walk-around that beats roadside inspections, built into a 10-minute mobile workflow.
Why a Standardized Order Beats a Thorough Memory
The difference between a passing driver and an OOS driver is rarely thoroughness. It is sequence. Here is why running the same path every morning catches what random thoroughness misses.
18.1%
of vehicles placed OOS at the 2025 CVSA International Roadcheck — almost all for defects visible during a proper walk-around
62%
of OOS orders were brakes (41%) + tires (21.4%) — both fully catchable in 30 seconds at the wheel position
14,000
accidents prevented annually by pre-trip inspections, per FMCSA — when drivers actually do them
$4,200
average penalty per OOS violation — before counting CSA score damage that compounds for 24 months
The 7-Step Walk-Around Path — Time Budget: 10 Minutes
This is the FMCSA-recommended sequence used in CDL training nationwide. Follow it in this exact order every morning. The path itself trains the eye — drivers who switch the order miss the same components their bodies were trained to check from a specific position.
1
VEHICLE OVERVIEW / APPROACH
~30 sec
Approach from the front. Note vehicle lean (suspension/load), fresh leaks under chassis, body damage, license plate present and visible, vehicle parked safely with wheels chocked or parking brake on.
2
ENGINE COMPARTMENT
~2 min
Hood up. Check oil, coolant, power steering, washer fluid levels. Belts: alternator, water pump, power steering — max 3/4" play, no cracks or frays. Air compressor securely mounted, no air or oil leaks. Hoses firm, no bulges or chafe marks. Battery secured, terminals clean.
3
IN-CAB / START ENGINE
~1.5 min
Three points of contact climbing in. Buckle up. Check parking brake, gauges, steering wheel play (max 10° / 2"), horn, wipers, mirrors, windshield. Start engine — listen for unusual sounds. Watch oil pressure rise, alternator output stabilize. Test heater/defroster and emergency equipment (triangles, fire extinguisher, fuses).
4
DRIVER-SIDE WALK-AROUND
~2 min
Door + mirror secure, no cracks. Fuel tank mounted, cap on, no leaks. Battery box latched. Tire condition: tread depth (4/32" steer min), no cuts/bulges/exposed cord, valve stem intact, PSI within spec. Wheel: lug nuts present and tight, no cracks, oil seal intact. Suspension: springs, shocks, U-bolts secure, no cracks.
5
REAR OF VEHICLE / COUPLING
~2 min
For combination: fifth-wheel locked, locking jaws around kingpin, release lever in locked position, no gap between trailer and fifth-wheel plate, mounting bolts secure. Air and electrical lines properly connected, no cuts or chafe. Mudflaps present. Rear lights, reflectors, license plate. Cargo secure for trailer load.
6
PASSENGER-SIDE WALK-AROUND
~1.5 min
Mirror image of driver side: tires, wheels, suspension, brakes, fuel/air tanks. Special attention to inboard duals — most-missed visual area in the entire walk-around. Use flashlight for inboard sidewall, brake drum visibility, hose chafe.
7
AIR BRAKE CHECK + LIGHT CHECK
~1 min
Air brake test (LAB procedure) — see numbers below. Then walk the perimeter testing headlights, brake lights, signals, hazards, clearance lamps, reflectors. Every lamp lit, no cracked lenses. Document any defects in the DVIR before you move.
10 minutes total, broken into clear time budgets per step. Drivers who consistently exceed 12 minutes are either skipping items or learning the routine — both fix themselves with repetition.
Start free with HVI and see the timed workflow.
The Air Brake Numbers You Have to Memorize
Air brake performance is the most-tested part of a CDL pre-trip and the most-cited at roadside. There is no rounding on these numbers. Either the system meets the threshold or the vehicle does not move.
Test
Single Vehicle
Combination
Air pressure build-up (85 to 100 PSI)
Within 2 minutes
Within 2 minutes
Governor cut-out
120–140 PSI
120–140 PSI
Pressure hold (engine off, brakes applied, 1 min)
Drop no more than 3 PSI
Drop no more than 4 PSI
Low-air warning
Activates at ~60 PSI
Activates at ~60 PSI
Spring (parking) brake
Pops out 20–45 PSI
Pops out 20–45 PSI
The LAB procedure (Low-air, Applied, Build) is one continuous test. Run it after the walk-around with the engine started, parking brake set, then proceed: fan air pressure down to test low-air warning and spring-brake pop-out, then build pressure back up to test build-up time and governor.
Book a demo.
The "Touch + Name + Check + Condition" Discipline
CDL examiners require drivers to verbalize every inspection point in a specific order. Even drivers who passed their road test years ago benefit from running this verbal pattern internally — it forces complete attention to each component.
T
TOUCH
Point to or touch the component physically
N
NAME
"This is the alternator belt"
C
CHECK
"I'm checking for cracks, fraying, and proper tension"
C
CONDITION
"No cracks, no fraying, proper tension — no more than 3/4 inch play"
Photo-Paired Component Checklist by Zone
This is the operational backbone of the modern pre-trip: every safety-critical component gets a paired photo at capture. The photo is what turns "tires OK" into evidence — for the next-driver chain, for the auditor, and for the litigator three years from now.
Zone 4 + 6 — Wheel Position (Both Sides)
Tire tread depth + sidewall — 1 photo per position
Wheel + lug nuts close-up — show all lugs visible
Brake drum / chamber — accessibility photo
Air hose / lines — any chafe or wear shown clearly
Zone 5 — Coupling System
Fifth-wheel locked + kingpin engagement
Locking jaws around kingpin (no gap visible)
Air + electrical lines connected, no chafe
Mudflaps in place
Zone 7 — Lights & Reflectors
Front lamps lit — single photo capturing all
Rear lamps lit — single photo capturing all
Clearance / marker lamps both sides
Any cracked lens or non-working lamp documented separately
Any Defect Found
2 photos: wide context + close-up
Reference object for scale (hand, glove, coin)
Severity tag at capture (Critical / Acute / Minor)
GPS + timestamp + driver ID auto-attached
The 5 Most-Missed Items — And Where They Hide
Across thousands of roadside OOS orders, the same items get missed in pre-trip after pre-trip. Memorize where they hide and your walk-around catches what 95% of drivers miss.
01
Inboard dual sidewall damage
Hidden between the duals — invisible without crouching and using a flashlight. Most drivers check the outer dual only.
02
Clearance / marker lamp burnout
Especially on trailer corners and the top of the cab. Walk-around-but-not-watching catches the missing lamp; checking each lit lamp catches the dim or out one.
03
Brake adjustment
Pushrod stroke is the bright-line OOS test (typically 2" max for Type 30 chambers). Inspectors crawl under the truck for this; drivers rarely do.
04
Air-line chafe at frame crossover
Where air lines run from cab to chassis, vibration wears the line against frame members. Catches fire-marshal attention; catches inspector attention.
05
Fifth-wheel gap
Visible only from the rear quarter angle, not directly behind. A 1/4-inch gap between trailer and fifth-wheel plate means the locking jaws are not fully engaged — and is an instant OOS finding.
All 5 of these are visible during a properly sequenced 7-step walk-around. They are missed because drivers skip the position (inboard dual), the angle (fifth-wheel from quarter), or the depth (crouching to see brake stroke).
Start free with HVI and let the workflow prompt every position.
The Time Target: Why 10 Minutes Works
Less than 8 minutes and you are skipping items. More than 15 minutes and you have not built the routine. The 10-minute target works because it is enough time to be thorough and short enough to be daily.
Under 8 min
Skipping. Almost certainly missing inboard duals, brake stroke, or fifth-wheel angles. New drivers physically cannot complete the routine this fast.
8–12 min
The target zone. Thorough, sustainable, defensible. This is what experienced drivers settle into after 2–3 weeks of consistent practice.
12–15 min
Acceptable while learning the routine. New drivers and CDL trainees commonly run here. Will compress to 10 minutes within 30 days of daily practice.
Over 15 min
Either learning the routine or running in the wrong order. Standardize the sequence and the time drops fast — randomness is what kills speed.
Make the 7-Step Routine Automatic with HVI
Guided 7-zone mobile workflow. Photo prompts per component. Time tracking per zone. Air-brake numbers as required fields. Defects auto-routed. 3-signature chain enforced. Trusted by 25,000+ users worldwide.
Frequently Asked Questions
Q: What are the 7 steps of a CDL pre-trip inspection?
The FMCSA-recommended 7-step walk-around order is: (1) Vehicle overview / approach, (2) Engine compartment, (3) In-cab inspection and start engine, (4) Driver-side walk-around, (5) Rear of vehicle and coupling system, (6) Passenger-side walk-around, (7) Air brake check + light walk-around. The sequence is used in CDL training programs nationwide and covers roughly 45 inspection points on the power unit plus 15 on the trailer.
Q: How long should a pre-trip inspection actually take?
10 minutes is the working target for a typical Class A combination after the routine becomes consistent. New drivers and CDL trainees commonly run 12–15 minutes while learning the sequence — this compresses to 10 within about 30 days of daily practice. Under 8 minutes means items are being skipped (almost always inboard duals, brake stroke, or fifth-wheel angles). Over 15 minutes usually means the order is not standardized yet.
Start free with HVI.
Q: What air brake numbers do I need to memorize?
Five critical numbers: (1) Pressure build-up from 85 to 100 PSI within 2 minutes, (2) Governor cut-out between 120 and 140 PSI, (3) Pressure hold with engine off and brakes applied — drop no more than 3 PSI per minute single vehicle or 4 PSI combination, (4) Low-air warning activates at approximately 60 PSI, (5) Spring (parking) brake pops out at 20–45 PSI. These are non-negotiable for the CDL test and at roadside inspections.
Book a demo.
Q: What is the touch-name-check-condition rule?
CDL examiners require drivers to perform inspection items in a specific verbal order: (1) Touch or point to the component physically, (2) Name what it is, (3) State what you are checking for, (4) Describe the acceptable condition. Example: touch alternator belt → "this is the alternator belt" → "I'm checking for cracks, fraying, and proper tension" → "no cracks, no fraying, proper tension, no more than 3/4 inch play." This pattern is the basis of CDL test scoring and a useful internal discipline for experienced drivers too.
Q: What are the most-missed pre-trip items?
Five items account for the bulk of "defect was visible but missed" findings at roadside: (1) Inboard dual sidewall damage — hidden between the duals, requires flashlight and crouch, (2) Burnt-out clearance and marker lamps — especially trailer corners and cab tops, (3) Brake adjustment / pushrod stroke — requires crawling under for the bright-line test, (4) Air-line chafe at frame crossover — vibration wears lines against frame, (5) Fifth-wheel gap — only visible from the rear quarter angle, not directly behind. All five are catchable during a properly sequenced 7-step walk-around.
Start free today.
Q: How does HVI guide the 7-step routine?
HVI builds the FMCSA 7-step sequence into a guided mobile workflow: zones appear in order (drivers cannot skip ahead), each component has a photo prompt, air-brake numbers are required numerical fields, defects auto-route to maintenance with instant work-order generation, and the 3-signature chain (driver post-trip → mechanic repair → next-driver acknowledgment) is enforced as required steps. The walk-around becomes the same every morning by design — not by hope.
Book a demo.