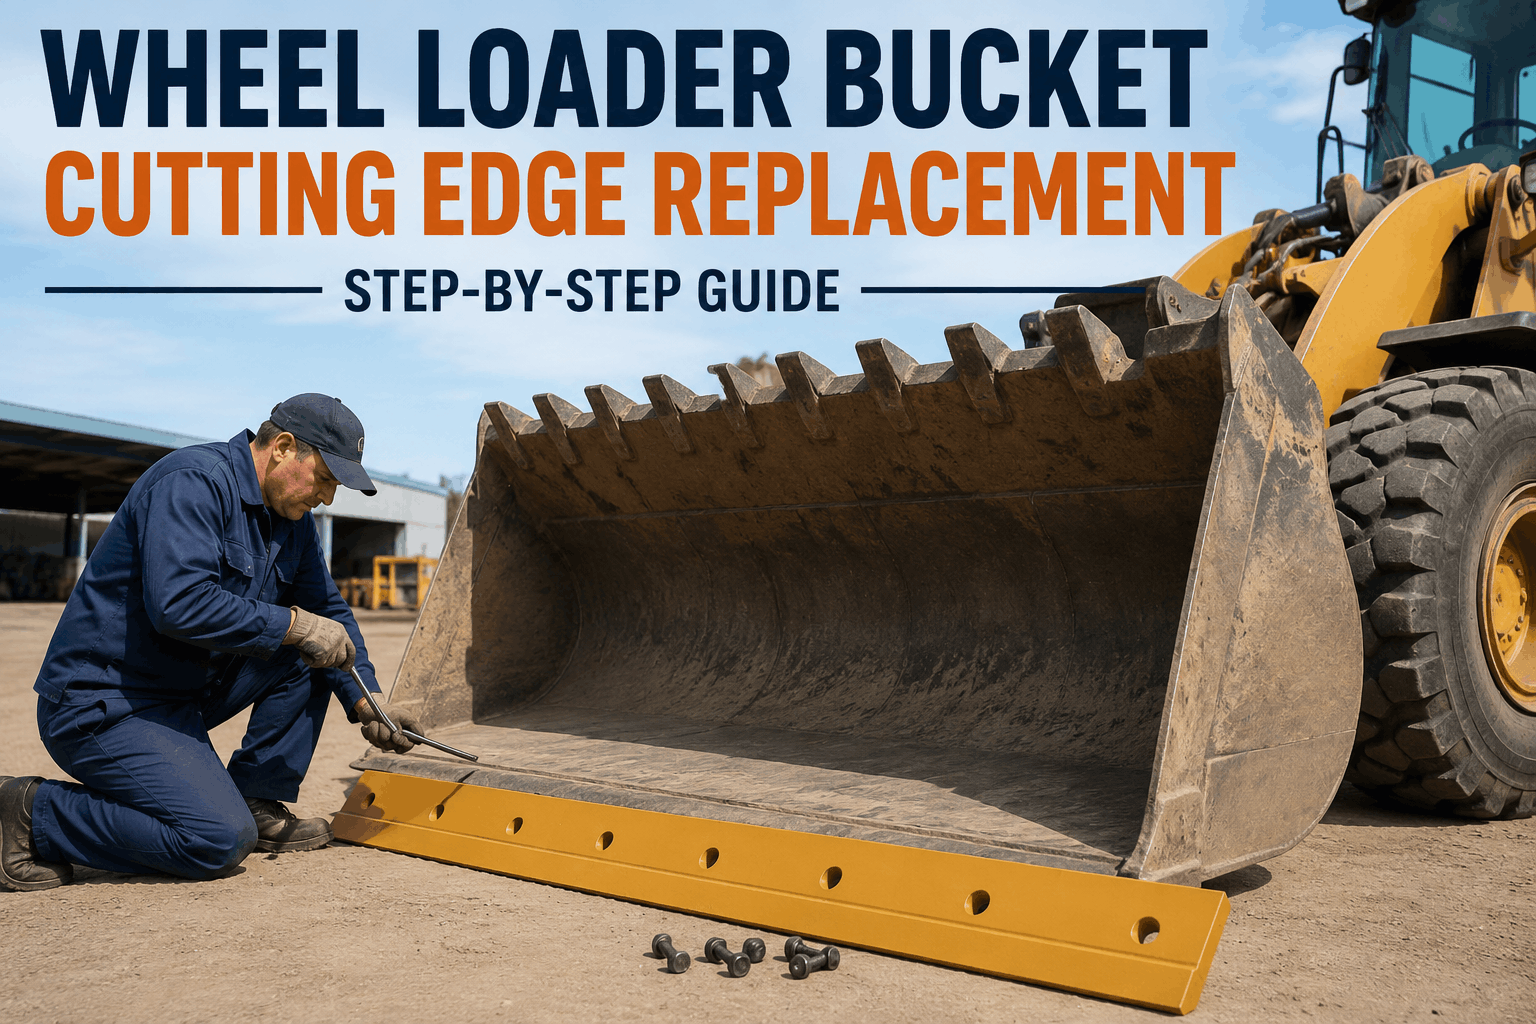
A wheel loader bucket cutting edge is the cheapest wear part on the machine and the one most operators run too long. By the time the edge wears into the base edge — the welded "frog" that the cutting edge bolts to — a $200 part replacement becomes a $2,000 base-edge rebuild, and the bucket loses structural stability in the process. The cutting edge is a sacrificial part by design: it takes the abrasion so the bucket does not. Replacing it on schedule, with the right edge type and the right install procedure, is one of the highest-return maintenance tasks a mechanic or operator performs. But the job has real decision points that get botched: bolt-on versus weld-on (each with a different cost, downtime, and reversibility profile), reading the wear pattern to diagnose what is actually happening to the bucket, choosing the right steel hardness for the material being moved, and — for bolt-on edges — torquing the plow bolts correctly so they neither back out nor shear. This guide walks mechanics and operators through the full replacement: when to replace, how to read the wear pattern, bolt-on versus weld-on selection, hardness choice by application, and the step-by-step install with torque and welding procedure. HVI's inspection & maintenance software tracks cutting-edge wear as a scheduled inspection item — logging wear measurements, flagging replacement thresholds, and recording the install so the next edge change is planned, not reactive.
Never Run a Cutting Edge Into the Base Edge Again
HVI tracks cutting-edge wear as a scheduled inspection item, flags the replacement threshold before the edge wears into the bucket, and logs every install with torque and material spec. Turn a reactive $2,000 base-edge rebuild into a planned $200 edge swap.
Anatomy: What You Are Actually Replacing
Before the job, know the parts. Confusing the cutting edge with the base edge is how mechanics order the wrong part — and how operators run the edge too long.
LAYER 1
Cutting Edge
The sacrificial wear part that contacts the ground. Bolt-on or weld-on. Through-hardened steel. This is what you replace regularly — designed to wear out so the bucket does not.
LAYER 2
Base Edge ("Frog")
The welded support structure the cutting edge attaches to, with pre-drilled holes matching the bolt pattern. The bucket's primary structural support. Replace only when damaged — a far bigger job.
LAYER 3
Bucket Shell
The bucket body itself. If the cutting edge and base edge are maintained, the shell lasts the life of the machine. Running an edge too long puts the shell at risk.
The whole point of replacing the cutting edge on schedule is to protect layers 2 and 3. Wear into the base edge and you turn a routine swap into a structural repair.
Start free with HVI and track the wear threshold.
Step 1: Read the Wear Pattern — It Tells You What Is Wrong
The wear pattern on a cutting edge is a diagnostic readout. Before you replace it, read it — because uneven wear points to an operating or setup problem the new edge will suffer too if you do not fix the cause.
Even wear across the full edge
Healthy. Operator is keeping the bucket flat to the ground. Just replace on schedule.
Center worn faster than corners
Normal for most loading work — the center does the most digging. Consider a thicker center segment or rotate a reversible edge.
One corner worn heavily
Operator habit — consistently digging or grading on one side. Coaching fixes this; otherwise the new edge wears the same way.
Rounded / rolled edge
Edge ran too long or steel too soft for the material. Move to a harder grade (AR400 or Hardox 500).
Chipped / cracked edge
Steel too hard/brittle for high-impact work, or hitting rock/rebar. Move to a tougher, slightly softer grade with more impact resistance.
Wear reaching bolt holes / base edge
Critical — replace immediately. Past this point you risk damaging the base edge and losing bucket stability.
Step 2: Bolt-On vs Weld-On — The Core Decision
This is the decision that defines the whole job. Both protect the bucket; they differ on cost, downtime, skill required, and reversibility. Match the choice to your shop capability and application.
Install Skill
Basic hand tools, impact wrench
Certified welder, preheat capability
Replacement Speed
Fast — unbolt, swap, torque
Slow — grind off, chamfer, weld, cool
Reversible?
Yes — flip for 2x life (double bevel)
No — single use
Field Replaceable?
Yes — on the jobsite
Shop only (preheat + cooling)
Profile / Snag Risk
Bolt heads can catch (use plow bolts)
Flush — smooth profile
Best For
General loading, frequent swaps, field service
High-abrasion, smooth-floor work, max edge life
Most general-purpose wheel loaders run bolt-on edges for the field-replaceability and reversibility. Weld-on wins for high-abrasion applications where a flush profile and maximum edge thickness matter most.
Book a demo to see HVI's wear-part tracking.
Step 3: Choose the Hardness for Your Material
Steel hardness is a trade-off: harder resists abrasion but chips under impact; tougher (slightly softer) survives impact but wears faster in abrasive material. Match the grade to what the bucket actually moves.
AR400 / ~400 HB
General Purpose
The workhorse. Good balance of abrasion resistance and impact toughness. Soil, gravel, mixed aggregate, snow. The default for most loaders.
Hardox 500 / ~500 HB
High Abrasion
Harder, longer-lasting in abrasive material — sand, crushed stone, slag, quarry fines. More edge life where wear (not impact) is the enemy. Less forgiving of rock impact.
Tougher / Lower HB
High Impact
Slightly softer, more impact-resistant grades for rocky, shot-rock, or rebar-laden material where chipping is the failure mode. Trades some abrasion life for crack resistance.
Manganese (16Mn)
Work-Hardening
Work-hardens under impact — gets harder as it is used. Common in heavy-impact and rock applications. Specialty choice for specific high-impact duty cycles.
Step 4: Bolt-On Install — Step by Step
The bolt-on procedure for a field or shop swap. The torque step is where most installs go wrong — under-torqued bolts back out, over-torqued plow bolts shear.
1
Park Safe & Support the Bucket
Lower bucket to ground or onto solid blocking. Engage parking brake, kill engine, relieve hydraulic pressure. Never work under a bucket held by hydraulics alone.
2
Remove the Old Edge
Run an impact wrench on the nuts. Seized bolts: heat the nut or cut the bolt head and drive the shank out. Clean the base edge face — remove rust, packed material, and old thread locker.
3
Inspect the Base Edge
Check for elongated holes, cracks, or wear into the frog. If the base edge is damaged, stop — it must be repaired or replaced before the new cutting edge goes on, or the new edge will not seat true.
4
Position & Fit the New Edge
Align bolt holes. Plow bolts seat from inside the bucket with the countersunk head flush; nuts go on the outside/bottom. Confirm bevel orientation — single bevel down, or correct face for double bevel.
5
Torque in Sequence
Snug all bolts first, then torque from center outward (or per OEM pattern) to the manufacturer's spec. Use a calibrated torque wrench. Plow bolts are torque-sensitive — follow the spec exactly to avoid shear or back-out.
6
Re-Torque After Break-In
Run the loader for a few hours, then re-check torque. Bolts seat and settle under load — a second torque pass after break-in is what keeps them from backing out over the edge's life.
TORQUE RULE
Always torque to the cutting-edge or bucket OEM specification for the specific bolt size and grade — there is no universal number. Bolt-on cutting edges typically use plow bolts in sizes from 5/8" to 1", each with its own torque value. Under-torque and bolts back out under vibration; over-torque and plow-bolt heads shear off. A calibrated torque wrench and the OEM spec sheet are not optional.
Step 5: Weld-On Install — The Procedure That Prevents Cracking
Weld-on edges (e.g. Hardox 500HB) are hardened steel — which means welding them wrong causes cracking. The preheat and cooling steps are not optional; they are what keep the weld and the edge from cracking under the hardness.
1
Remove old edge & prep. Grind or air-arc the old weld-on edge off. Grind the bucket lip clean to bright metal — remove all residue, rust, and old weld.
2
Chamfer the joint. Apply a ~30-degree chamfer to the edge of both the bucket lip and the new cutting edge, wide enough to facilitate a good penetrating weld.
3
Clamp & tack. Correctly assemble and clamp the new edge to the bucket. Tack weld in several positions along the length before any continuous welding to hold alignment.
4
Preheat per electrode. Preheat is what prevents weld cracking in hardened steel. Match preheat to electrode: 300 degrees C with AWS-E7018; 100 degrees C with AWS-E110-18G; no preheat only with austenitic rods like AWS-E307 or E312.
5
Fillet weld. Run the fillet weld along the clamped joint. Maintain consistent heat input. Follow the electrode manufacturer's amperage and pass guidance for the plate thickness.
6
Cool naturally. Allow the weld to cool slowly in still air. Never quench with water — rapid cooling causes thermal shock that cracks the weld or the hardened edge. This is the single most common weld-on failure.
Weld-on edges are a certified-welder job with preheat capability — not a field repair. If your shop lacks preheat and slow-cool capability, bolt-on edges are the safer choice.
Start free with HVI and log every edge install with its material and procedure.
Replacement Threshold: When to Pull the Trigger
The question every operator asks: how worn is too worn? Here are the working thresholds.
KEEP RUNNING
More than 1 inch of usable edge below the bolt holes (bolt-on) or above the bucket lip (weld-on). Even wear. No cracks or rolling.
PLAN REPLACEMENT
Edge worn to within ~1 inch of bolt holes or lip. Order the new edge now. Reversible bolt-on? Flip it for a second life. Schedule the swap.
REPLACE NOW
Wear reaching bolt holes or bucket lip, edge rolling or cracking, or base edge starting to contact ground. Past this point you risk the base edge — a 10x bigger repair.
Track Cutting-Edge Wear Before It Costs You a Bucket
Wear measurement logging. Replacement-threshold alerts. Install records with material and torque spec. Scheduled vs reactive. Photo verification. Trusted by 25,000+ users worldwide.
Frequently Asked Questions
Q: How do I know when to replace a wheel loader cutting edge?
Replace before the wear reaches the bolt holes (bolt-on) or the bucket lip (weld-on). The working rule: keep running with more than ~1 inch of usable edge remaining, plan replacement at ~1 inch, and replace immediately once wear reaches the holes/lip, the edge starts rolling or cracking, or the base edge begins contacting the ground. Running past this point risks the base edge — a repair roughly 10x the cost of an edge swap.
Q: Should I use a bolt-on or weld-on cutting edge?
Bolt-on for general loading, frequent swaps, and field service — it installs with basic tools, is field-replaceable, and double-bevel versions flip for a second life. Weld-on for high-abrasion work where a flush profile and maximum edge thickness matter, but it requires a certified welder with preheat capability and shop conditions. Most general-purpose loaders run bolt-on for the convenience and reversibility.
Start free with HVI.
Q: What hardness of cutting edge should I choose?
Match the grade to your material. AR400 (~400 HB) is the general-purpose workhorse — good abrasion resistance and impact toughness for soil, gravel, and mixed aggregate. Hardox 500 (~500 HB) lasts longer in high-abrasion material like sand and crushed stone but chips more easily under impact. Tougher, slightly softer grades suit rocky high-impact work where chipping is the failure mode. Manganese (16Mn) work-hardens under impact for specialty heavy-impact duty.
Book a demo.
Q: What torque do bolt-on cutting edge bolts need?
There is no universal number — always torque to the cutting-edge or bucket OEM specification for the specific plow-bolt size (typically 5/8" to 1") and grade. Snug all bolts first, then torque from center outward to spec with a calibrated torque wrench, and re-torque after a few hours of break-in. Under-torque lets bolts back out under vibration; over-torque shears the plow-bolt heads. The re-torque pass after break-in is what keeps them tight for the edge's life.
Q: Why does my weld-on cutting edge keep cracking?
Almost always a preheat or cooling problem. Hardened cutting-edge steel (like Hardox 500HB) cracks if welded cold or cooled too fast. Preheat to match your electrode (300 degrees C for AWS-E7018, 100 degrees C for AWS-E110-18G, or use austenitic rods like AWS-E307/E312 with no preheat), chamfer the joint ~30 degrees, tack in several spots before the fillet weld, and let it cool naturally in still air. Never quench with water — thermal shock cracks the weld or the edge.
Start free today.
Q: How does HVI help with cutting-edge maintenance?
HVI tracks the cutting edge as a scheduled wear item: operators log wear measurements during routine inspections, the platform flags the replacement threshold before the edge reaches the base edge, and each install is recorded with material grade, bolt-on/weld-on type, and torque or weld procedure. The wear history turns edge replacement from a reactive scramble into a planned task — protecting the base edge and bucket shell from the expensive damage that running an edge too long causes.
Book a demo.