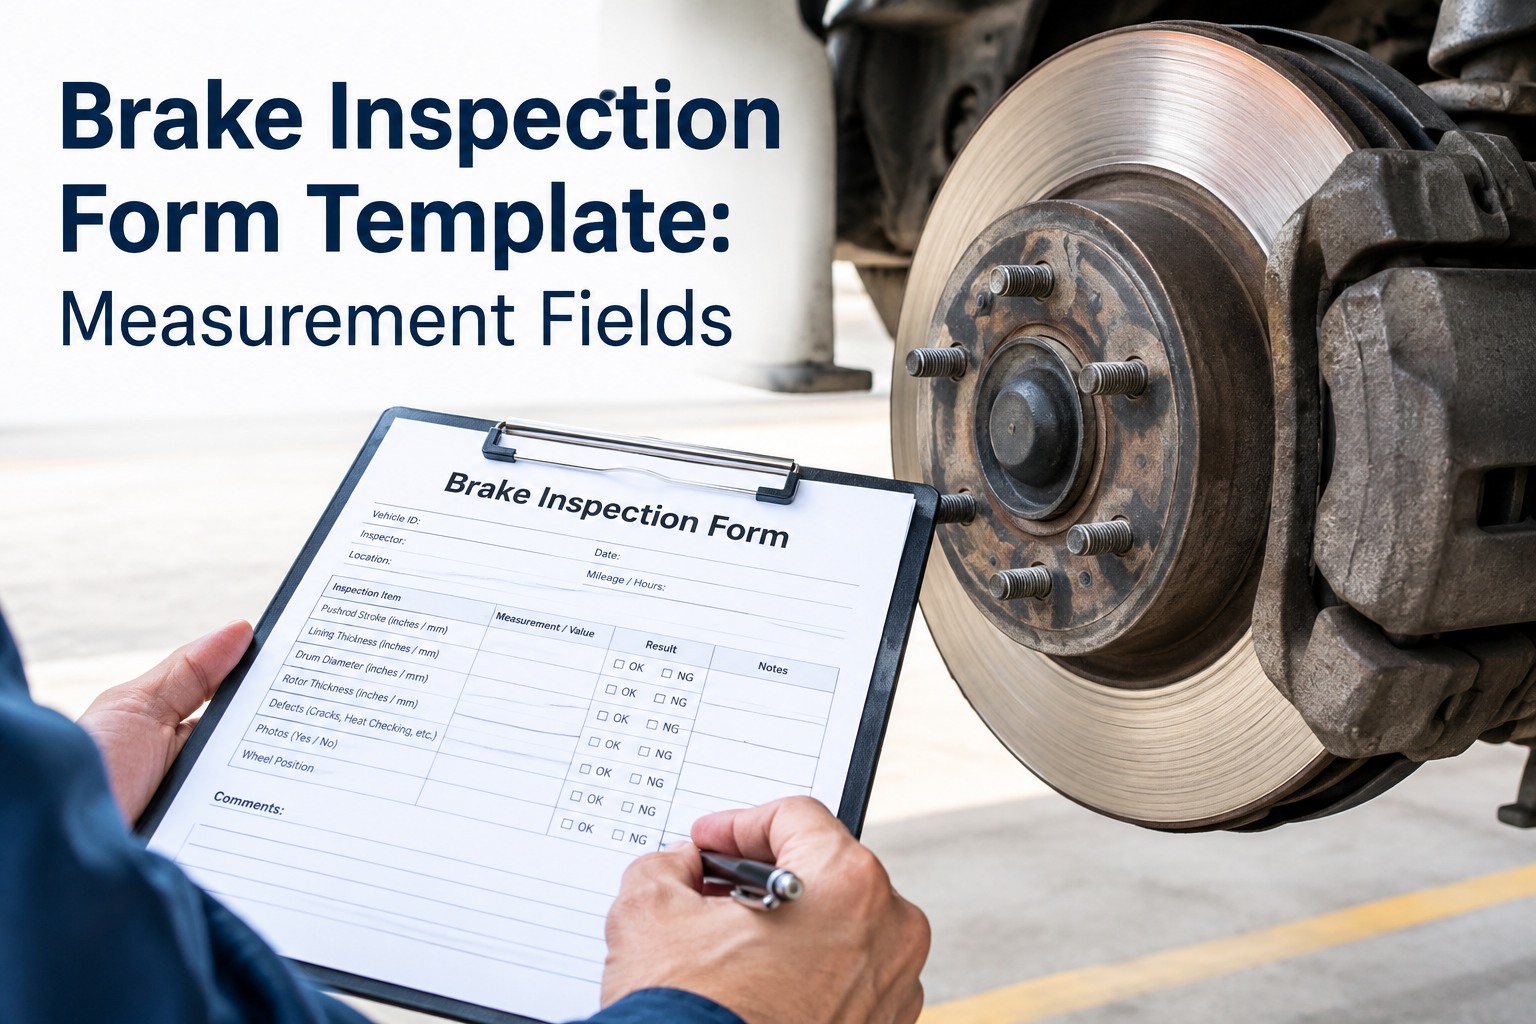
Most brake inspection forms fail at the same place: they ask a technician to tick "pass" on a system that's really a set of numbers. A brake either measures within limit or it doesn't — pushrod stroke, lining thickness, drum diameter, rotor thickness — and a checkmark throws all of that away. A good brake inspection form is built around capturing those measurements by wheel position, not a column of ticks. See brake measurements captured and trended digitally
A brake is a measurement, so a pass/fail box can't hold it
"Brakes: OK" tells you nothing you can act on. Was the stroke 1.5 inches or 1.9? Is that corner trending toward its limit or holding steady? A tick box can't answer either. The fix isn't a longer checklist — it's the right kind of field on the items that are actually numbers.
Building a form that captures that starts with one distinction: some brake items are measurements, and some are visual conditions. Mixing them into one undifferentiated tick column is what makes most forms useless. Below is how to separate the two, why wheel position matters more than vehicle-level records, and the fields that turn a form into a record.
Two kinds of brake fields: measured vs condition
Every brake inspection item falls into one of two field types, and building the form means knowing which is which. Measured items need a number field compared to a limit; condition items need a pass/fail/defect state with room for a photo. Force a measurement into a tick box and you lose the trend; force a visual condition into a number field and you frustrate the technician.
- Pushrod stroke — against the chamber's adjustment limit
- Lining / pad thickness — against the axle and brake-type minimum
- Drum diameter — against the stamped discard limit
- Rotor thickness — against the manufacturer discard spec
These get a numeric field, a unit, and the applicable limit — so the form can flag an over-limit reading and trend it over time.
- Chambers — corrosion, mounting, clamp band, leaks
- Hoses & air lines — chafing, bulging, secured
- Slack adjusters — condition, free play, function
- Drum/rotor surface — cracks, heat checking, scoring
These get a state and a photo field — the evidence lives in the image, not a number.
The how-to for each measurement — where to measure, which limit applies — is its own topic; we cover pushrod stroke, lining thickness, drums, and rotors in dedicated guides. The form's job isn't to re-teach measurement; it's to capture it correctly. Book a demo to see measured and condition fields on one template
Why the form must record by wheel position
This is the single most important structural decision in a brake form, and the one most paper forms get wrong. A vehicle-level "brakes: pass" — or even a single stroke number for the truck — hides the thing that matters most: which specific wheel-end is drifting. Brakes wear per corner, fail per corner, and get diagnosed per corner. The form has to match.
If you take one thing from this guide into your form design, make it this: structure the form around wheel positions first, then hang the fields off each one. Everything useful downstream depends on it. Book a demo to see readings captured per wheel-end Start free and record every measurement by wheel position
The form has to fit the brake configuration
A common form-design mistake is assuming every brake uses the same measurements. It doesn't — and a form that forces a rotor-thickness field onto a drum brake, or a drum-diameter field onto a disc, produces confusion and "N/A" clutter. The form should adapt to what's actually on the wheel-end.
Drum-brake wheel-end
The measured fields are lining thickness at the shoe center, pushrod stroke against the chamber limit, and drum diameter against the discard limit. Condition fields cover the drum surface, slack adjuster, and S-cam. No rotor field applies.
Air-disc wheel-end
The measured fields are pad thickness (inner and outer) and rotor thickness against the manufacturer discard spec. Condition fields cover rotor surface and the caliper slide. No drum-diameter or shoe-center lining field applies.
Identify the type first
Because the applicable limit depends on chamber and brake type, the form should capture the brake/chamber type where it changes which limit applies — so the right field, and the right limit, load for that wheel-end rather than a generic one.
Scope the air-system checks
Include air-system items — leakage, system performance — only where they're part of the intended inspection scope, not as universal fields on every brake form. A wheel-end condition form and a full air-system check are different scopes.
The principle underneath all four: a field should appear only when it applies to the brake in front of the technician. That's exactly why a single static PDF struggles and a configurable template by brake type doesn't. Book a demo to see templates adapt to drum vs disc wheel-ends
The fields that turn a form into a record
Beyond the measurements and conditions themselves, a handful of fields are what separate a form you file and forget from a record you can act on, prove, and plan from. Build these into the template and every inspection produces something durable.
Those fields are also what make the difference between distinguishing a regulatory out-of-service limit, a manufacturer service limit, and your own fleet replacement threshold — because with severity and the measured value both recorded, a reading can be judged against whichever limit applies rather than collapsed into a single pass/fail. Book a demo to see brake defects routed into corrective work
The fields your brake inspection form must have
If you're building or auditing a brake form, this is the field list that separates a record from a checkmark — each one is the difference between data you can trend and a tick you can't. Use this brake form online free, so every measurement lands against its limit and wheel position automatically.
From a maintenance manager who redesigned the brake sheet
Our old brake sheet was one line: "brakes — pass/fail." A tech could sign off a truck in ten seconds and the record told me nothing. When a wheel-end failed at a roadside, I'd pull the file and find a checkmark from three weeks earlier. Useless for defending anything or spotting a trend.
We rebuilt it around wheel positions with actual number fields — stroke, lining, drum — and a photo field for the condition stuff. Suddenly the same corner reading long every service jumped out, and I could see the units heading for a brake job a month ahead. The form didn't get longer; it got structured. That's the whole difference.
Frequently asked questions
What should a brake inspection form include?
Two kinds of fields, not one pass/fail column. Measured fields capture a number against a limit — pushrod stroke, lining thickness, drum or rotor wear. Condition fields flag defects that aren't numbers — leaks, cracks, contamination. Both recorded by wheel position, with severity and a photo. That's what lets you trend wear and prove a reading against its limit, which a checkmark never can.
Why record brake measurements by wheel position?
Because brakes wear, fail, and get diagnosed per corner — and a vehicle-level result erases the information that matters most. One position reading worse than its mates is a diagnosis (imbalance, a sticking caliper, a foundation-brake fault). Recording by position also builds a per-corner wear trend, so you can see which brake will hit its limit first and plan the replacement instead of reacting.
Should a brake inspection form use pass/fail or measurements?
Both — applied to the right items. Some brake items are measurements (pushrod stroke, lining, drum/rotor wear) and forcing them into pass/fail throws away the number you need to trend. Others are genuinely conditions (a leak, a crack, contamination) that a number can't capture. The mistake is using one approach for everything; the fix is measured fields for the numbers and condition flags for the rest.
Does one brake inspection form work for every vehicle?
No — and assuming it does is a common source of missed checks. Air-brake and hydraulic systems, disc and drum, tractor and trailer all use different measurements and items. A single generic form either asks for readings that don't apply or omits ones that do. The form should adapt to the brake configuration of the unit being inspected, so every field on it is one that actually matters for that machine.
How does a digital brake form help with replacement planning?
By turning each reading into a wear trend the moment it's recorded against a consistent wheel position. A paper form captures a measurement; a digital one captures it and compares it to the last few, so you see the rate, not just today's number. That's what lets you forecast when a corner hits its limit and schedule the replacement into a planned window instead of finding it at a roadside or a failure.
Build a brake inspection form that captures more than a checkmark
HVI turns this structure into configurable brake templates by inspection type and brake configuration — measurement fields by wheel position, condition fields with photos, defect severity, corrective-action routing, bulk template import across your fleet, and measurement history that trends per position for replacement planning. The same inspection, captured as data you can act on and prove. Live on your fleet in days.
No credit card · Configurable templates by brake type · Bulk import ready